Tuesday, August 9, 2011

Bathe Your Soul

One of my favorite things to eat is sole poached in butter. Which got me to thinking the other day as I savored this decadent meal, what if I could poach my soul in butter? How good would that feel?

I'm going to work on that recipe.

In the meantime, I try to find recipes that are so satisfying they make my soul feel as if it's been bathed in butter. And you don't need actual butter to do that. You just need to feel happy about what you're eating.

Tonight I surprised myself with a simple recipe that I only tried because I didn't know what to do with Swiss chard. I never buy Swiss chard, I never buy tortellini, I never buy pine nuts, and I don't much like raisins, but because of an organic vegetable box delivery and a recipe that came with it, I ended up putting all of those things on a plate together. And it was delicious.


But let's not forget the secret ingredient that pulled it all together - garlic! A fine mince of garlic sauteed in oil coats the greens and nuts. The golden raisins, plumped in water and then added to the pan add rich sweetness to the bitter greens. Throw it on top of cheese tortellini, salty and creamy, and you have every texture and every flavor needed to bathe your soul in happiness. And you feel good because you don't even notice you're eating vegetables!

Swiss Chard with Raisins and Pine Nuts (Door to Door Organics)

Yield: 4 servings

Ingredients:
  • 3 tbs pine nuts
  • 2 lbs Swiss chard
  • 3 tbs raisins
  • tortellini (optional) - for four servings
  • 4 garlic cloves, minced
  • 2 tbs olive oil
  • salt and pepper, to taste (if tortellini is very salty, then no added salt is needed)

Place raisins in a bowl and cover with hot water for 10 minutes, drain.
Meanwhile, bring well salted water to a boil in a large pot and add the chard. Cook for 1 to 2 minutes and transfer to a bowl of ice water. After a few minutes, remove the chard and squeeze out water. Remove stems and coarsely chop.
Cook tortellini (if using) according to package directions.
Heat oil on medium in a nonstick skillet. Add the pine nuts and cook, stirring until they begin to lightly brown, 2 to 3 minutes. Add the garlic and cook briefly, stirring as you go. Add the chopped greens and raisins and stir together until they are well coated and heated through, 2 to 3 minutes. Season to taste with salt and pepper.
Serve with tortellini or as a side dish

Thursday, July 14, 2011

The Taste of Summer

Summer is flying by and I have been delinquent about updating this blog. I have a perfectly good excuse but sometimes when you make a commitment to something, it leaves other things behind before you realize it. People do that to their friends all the time...I only do it to my blog. But the good news is that I have not been delinquent about cooking.

Summer to me is about pulling out my ice cream maker, one acquired in a divorce which is pretty funny since I've never been married. But I'll take other people's discarded wedding gifts any time. Over the last few years, I've made all kinds of fruit ice creams - blueberry, strawberry, raspberry, and peach. I've made a few vegetable ice creams like pumpkin and corn. But this is the first time I've made an ice cream from a flower, or to be perfectly honest a tea bag of dried flowers.

I first had chamomile ice cream at a restaurant, on an apricot bread pudding. As soon as I tasted it, I was in love and came straight home to hunt down a recipe. The concept is fairly simple. Like a tea, you steep the dried chamomile in hot milk. Then carry on with ice cream making as usual, tempering the egg yolk, whisking up a custard, chilling and processing. But it tastes so much better than a tea. It's so good you'll want to pour cream into your next cup of chamomile tea to recreate that creamy flowery flavor, the color of freshness, the taste of summer.


Chamomile Ice Cream

Ingredients:
  • 1 cup milk
  • 2 cups heavy cream
  • A pinch of salt
  • 3/4 cup sugar
  • 1 chamomile tea bag (check ingredients - should be only dried chamomile flowers)
  • 5 large egg yolks
Heat the milk, cream, salt, and sugar in a 3-quart saucepan. Add the chamomile tea bag to the mixture. Cover and remove from heat for one hour to allow flavors to infuse. Remove the tea bag before proceeding.

In a separate bowl, stir together the egg yolks. Re-warm the milk then gradually pour some of the milk into the yolks, whisking constantly as you pour. Scrape the warmed yolks and milk back into the saucepan. Cook over low heat, stirring constantly and scraping the bottom with a heat-resistant spatula, until the custard thickens enough to coat the spatula.

Place the saucepan in a bowl of ice to cool. Refrigerate to chill thoroughly for at least 8 hours but preferably overnight. Freeze the custard in your ice cream maker according to the manufacturer’s instructions.

Sunday, May 1, 2011

Instead of French Fries

French fries are a food that I've avoided eating for years now. It's not that I refuse to eat carbs or fried foods or even pretend to be on a diet. But fries are one of those things I like but I can resist, and I may as well take advantage and resist them. I prefer to save my calories for those things I can't resist, like cheese, ice cream, and baked goods.

There is nothing that can replace the taste of french fries late at night, and it beckons those college days when we'd visit the 24 hour Burger King when nothing else was open. I'd order a milkshake and fries, their mingling salty and sweet a flavor profile that even today will make me feel 18 again. We'd talk about the boys in our classes or the tennis players from our floor or the guy who looked like actor Andrew Shue (Remember Melrose Place?). We'd huddle up in the cold walking back to the dorm, years of college ahead, friends we had only just met not knowing we'd be friends for life, not knowing which night would be the last one we'd make that BK run.

I don't miss those French fries, and I don't honestly miss that life or that age. But I miss that feeling of comfort, surrounded by friends and no real responsibilities other than making a decent grade and getting a date to dorm formal. I seem to be on a "grown up" theme lately, so here's my grown up version of French fries.


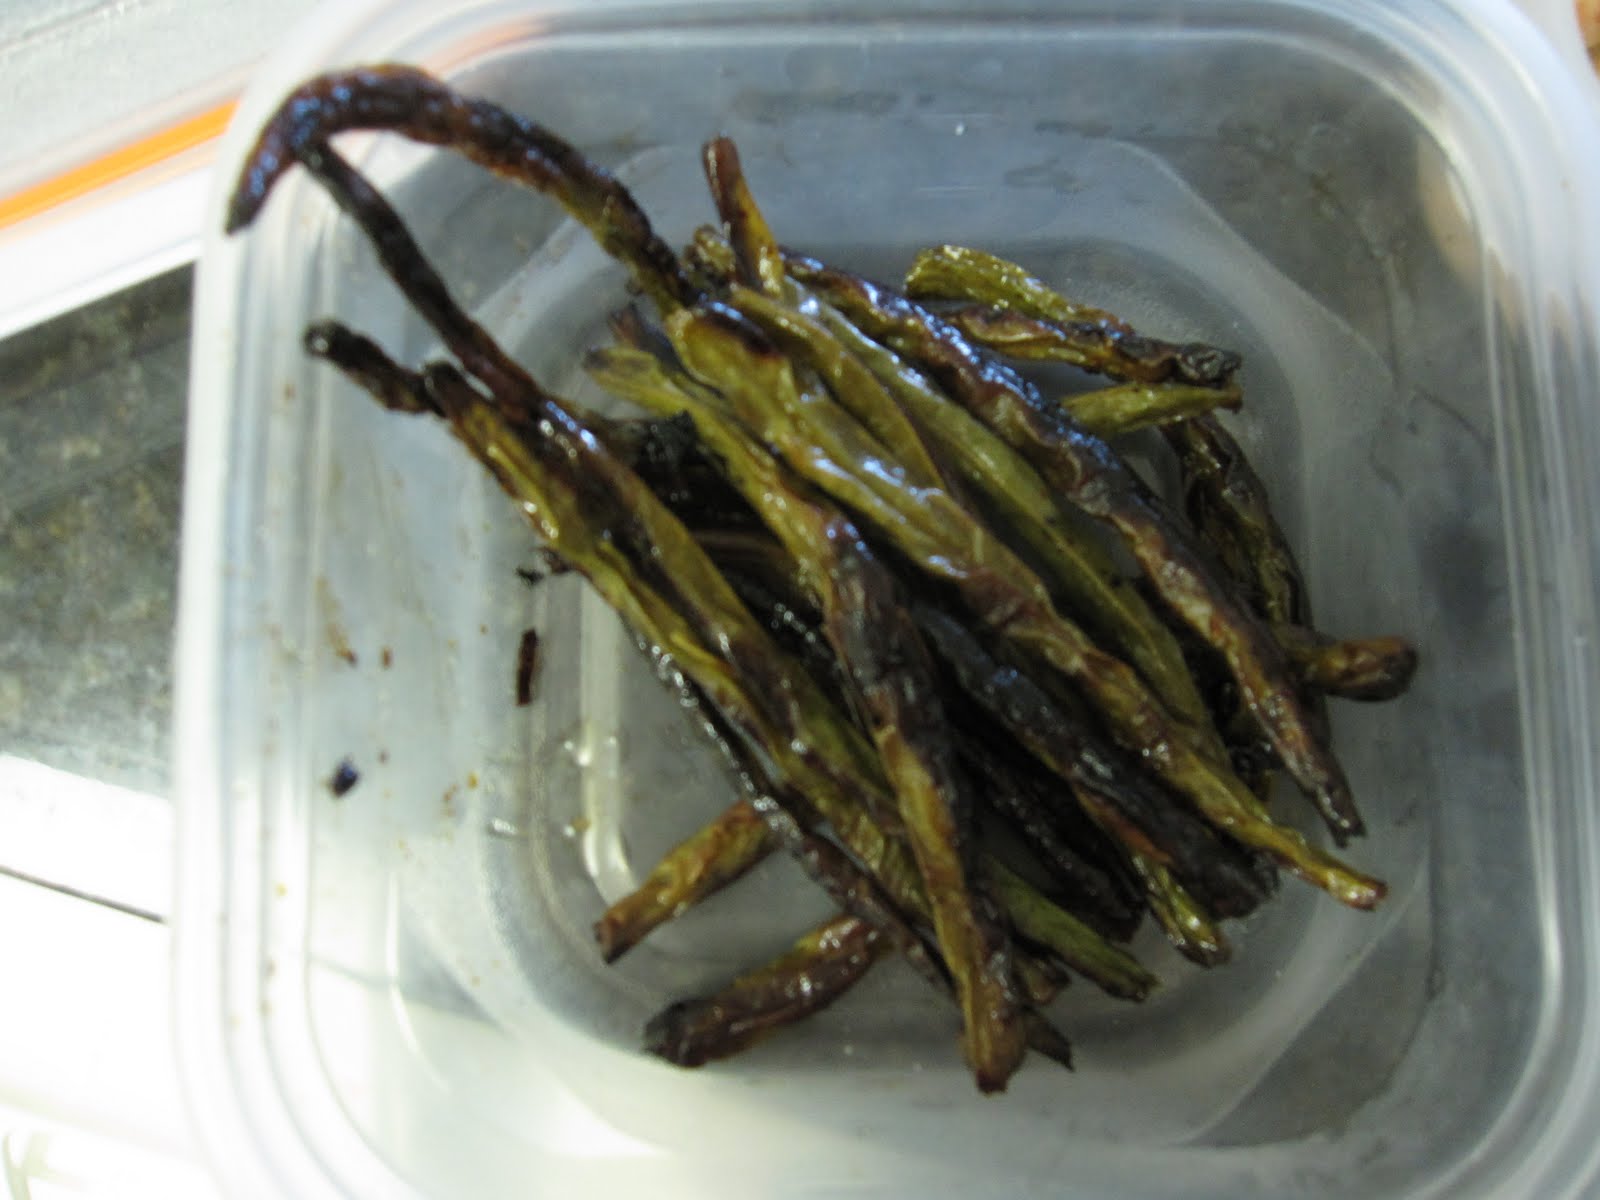
These roasted green beans look and sound like a vegetable, but the crispy salty exterior and tender interior is exactly like a fry. You'll pick them up and eat them with your hands and you won't be able to eat them fast enough. Eat them with your friends, gossip a little, let yourself feel like a college kid again - but a wiser, healthier version of one.

Roasted Sesame Green Beans (Cook's Illustrated)
Serves 4

Ingredients:
1 pound green beans, stem ends snapped off
1 tablespoon olive oil
1/2 teaspoon salt
1 tablespoon mince garlic
1 teaspoon minced fresh ginger
2 teaspoons honey
1/2 teaspoon toasted sesame oil
1/4 teaspoon hot red pepper flakes

Adjust oven rack to middle position; heat oven to 450 degrees. Line rimmed baking sheet with aluminum foil; spread beans on baking sheet. Drizzle with oil; using hands, toss to coat evenly. Sprinkle with 1/2 teaspoon salt, toss to coat, and distribute in an even layer. Roast 10 minutes. Meanwhile combine remaining ingredients in a small bowl. Remove baking sheet from oven. Using tongs, coat beans evenly with garlic/ginger mixture. Redistribute in an even layer. Continue roasting until dark golden brown in spots and starting to shrivel, 10 to 12 minutes longer. Adjust seasoning with salt and toss well to combine. Transfer to serving dish.

Saturday, April 23, 2011

Grown Up Spaghetti


This looks like just a pile of spaghetti. Any old pile of spaghetti. The kind I've been eating since I was a kid. I must have been 1o or 11 years old when I started "cooking" for myself. I boiled water and made spaghetti with salt, butter, and parmesan cheese. I made grilled cheese sandwiches. I mixed flour and milk and butter and made misshapen biscuits. I loved my hot dogs with mustard and cheese. Cooking for myself as a kid meant I didn't have to eat vegetables and other weird things my parents made me eat when they were home.

These days I still make all those childhood favorites, but they've matured a bit. Grilled cheese is no longer made with American cheese and white bread, but instead a variety of cheddar, brie, goat, or mozarella on challah, wheat, or homemade Italian loaf. Hot dogs are topped with homemade ketchup, hot peppers, and olive tapenade. I make rosemary biscuits or bacon biscuits with real bacon fat. And just recently I discovered an all new grown up way to eat my spaghetti.

That plain looking pile of spaghetti is actually covered with a luscious sauce, an anchovy carbonara. It has the flavor of a seafood pasta or a linguine and clam sauce. The anchovies and garlic are cooked in plenty of olive oil, then spiced up with lemon zest, red pepper flakes, oregano and parsley. The flavored oil is tossed together with hot pasta, and then the final touch is to stir beaten egg yolks into the hot pasta to create a creamy finish. I could lick the plate, it's so good.

I love it when I eat something that reminds me of childhood and that special feeling of cooking something good, all by myself, all for myself.

Spaghetti with Anchovy Carbonara (Food and Wine)

Ingredients:
12 ounces spaghetti
1/4 cup extra-virgin olive oil
3 large garlic cloves, thinly sliced
One 2-ounce can flat anchovies, drained and chopped
Pinch of Aleppo pepper or crushed red pepper
1/2 teaspoon finely grated lemon zest
1 tablespoon chopped oregano
1/4 cup chopped flat-leaf parsley
2 large egg yolks
Salt and freshly ground pepper

In a large pot of salted boiling water, cook the spaghetti until al dente. Drain the pasta, reserving 1/2 cup of the cooking water.

In a large, deep skillet, heat the oil with the garlic and anchovies and cook over moderately high heat until the anchovies have dissolved, about 2 minutes. Add the red pepper, zest, oregano and parsley, then add the pasta and toss to coat. Remove from the heat.

In a small bowl, whisk the yolks with the reserved cooking water and add to the pasta. Cook over low heat, tossing until the pasta is coated in a creamy sauce, about 1 minute. Season with salt and pepper and serve.

Monday, March 28, 2011

Hand Cut Noodles

Every once in a while, it's time to learn something new. You spent years of your life in school, learning all the time, started working and had to learn even more (usually nothing to do with what you actually studied in school), and finally you reach a point in your life where you're the expert and teacher. That's when it's time to humble yourself by buying a pasta maker.

I must have been delusional when I thought I could make pasta on a weeknight, after working out, when I was ready to eat almost as soon as I walked in the door. Here's what I thought: Mix some dough, run it through the pasta maker to flatten it, run it through the spaghetti cutter attachment, throw it in some boiling water and it's cooked in two minutes. Thirty, forty minutes tops.

Clearly I had never made my own pasta before.

The first problem was that I had no idea what the consistency of my dough should be. First it was too dry, then I made it too moist. It was sticking to everything. Once I got that sorted out, I ran it through the pasta maker attachment so it made a nice sheet of dough. And then I ran it through again and again and again, on finer settings each time. My dough stretched out into long, thin swatches, which I left laying around the kitchen on plates and cutting boards. Somehow a ball of pasta slightly larger than my fist made enough sheets to wallpaper my kitchen. Then I ran it through the spaghetti cutter attachment and got a long rope of dough with ridges in it. As soon as I tried to hold it, it smushed together again. Why was I imagining smooth, separate strands of spaghetti? When I finally gave up on that dream, I hand cut the rest of the dough into noodles and tossed them into boiling salted water. (Note that "hand cut noodles" are often a restaurant special. Now you know they evolved because the dough was sticking to the pasta maker and to itself.) The good news is that homemade pasta tastes great and super fresh!


Here I've tossed my hand cut noodles with broccoli and Italian sausage, a recipe from food52.

Saturday, February 26, 2011

Breakfast Couscous

As much as I like variety in all my meals, I've always been really boring when it comes to breakfast. That is because my breakfast cereal is dosed with crack and I cannot stop eating it. The box says it's just almonds, flakes, and honey. I swear there must be crack in there too though! Despite that addiction, I've branched out occasionally, obsessing over Mexican breakfasts, delicious muffins, oatmeal pancakes, and more. But most weekdays not only is it faster to pop open the cereal box, but also it requires less thinking at an early hour.

It's nice to have a hot breakfast, but it's effort. At least until I came across breakfast couscous. It's only a little more work than cereal seeing as it mostly involves pouring milk and couscous into a pot. There's a few other ingredients like brown sugar and cinnamon, dried fruit and nuts, but it's basically up to you what and how much you throw in there.

The best part is, it's really tasty. I could probably eat the entire 3 serving recipe myself. It's like a eating a bowl of rice pudding, all warm and creamy and sweet. Couscous is just another grain, pretty bland on its own and ready to take on the flavor of anything around it. Once I start making breakfast couscous, I want to have it every day for weeks on end. If I hadn't just made it myself, I'd think there was crack in this stuff too!


Breakfast Couscous (Cooking Light)
Yield: 2-3 servings

Ingredients:

  • 1/4 cups water
  • 1 cup nonfat milk
  • 1/2 cup uncooked couscous
  • 1/4 cup dried cranberries
  • 1/4 cup chopped walnuts
  • 2 tablespoons brown sugar
  • 1/2 teaspoon ground cinnamon
  • 1/8 teaspoon salt
Bring water and milk to a boil in a small saucepan; stir in remaining ingredients. Remove from heat. Cover; let stand 10 minutes. (Mixture will thicken as it cools.)

Tuesday, February 8, 2011

Laotian Fast Food

Since I came back from New Zealand where I consumed the most delicious Asian food, I've had some cravings. So I declared last week Asian food week in my kitchen. Singapore noodles, Vietnamese banh mi, steak salad with Thai salad dressing and Thai hot and sour soup were all on the menu. My repertoire already contains quite a few Asian foods.

I really like getting beyond the stir fry and soy sauce when it comes to Asian food. In fact I didn't even consider making Chinese, though some of the potstickers I made a few months ago were still in the freezer and I popped those into a pan as an appetizer to my noodles. Many parts of Asia are not well represented here. In New Zealand, there was Malaysian and Laotian food at the international food court. I would love to find such a food court here, with the creamy curries, noodles, and spices replacing the hamburgers, fries, and chicken sandwiches.

So it was perfect timing that I found a section of Laotian recipes in a recent issue of Food & Wine. The lettuce wraps I made with ground chicken, scallions, cilantro, shallots, and a surprise ingredient of ground rice powder were delicious. They tasted fresh, with the brightness of lime juice and the bite of raw shallots and scallions. I ground the toasted rice in my new spice grinder - if you have a coffee grinder it should work just as well - and this added a really nice, nutty texture to the dish.

I guess you could say this is the Laotian version of fast food tacos.


Ground Chicken Laap (Food and Wine)
Ingredients
1 tablespoon long-grain white rice
1 tablespoon vegetable oil
1 pound ground chicken (turkey or duck)
1/4 cup plus 2 tablespoons chicken stock or low-sodium broth
1 tablespoon plus 1 teaspoon Asian fish sauce
Salt and freshly ground black pepper
1 tablespoon fresh lime juice
2 large stalks of lemongrass—tender pale inner core only, minced
2 scallions, thinly sliced
1 medium shallot, thinly sliced and separated into rings
1/2 cup chopped cilantro
1/2 cup chopped mint
1/4 teaspoon crushed red pepper
Small romaine leaves and lime wedges, for serving

In a small skillet, toast the rice over high heat, shaking the skillet a few times, until the rice is golden brown, about 3 minutes. Transfer the rice to a spice grinder and let cool completely. Grind the rice to a powder.
In a large skillet, heat the oil. Add the ground meat and cook over moderately high heat, breaking up the meat evenly, until no pink remains, about 4 minutes. Add the stock and cook, stirring, until bubbling. Remove from the heat and stir in the fish sauce. Season with salt and black pepper and stir in the lime juice. Let stand for 5 minutes, then stir in the lemongrass, scallions, shallot rings, cilantro, mint, crushed red pepper and rice powder. Arrange the lettuce and lime wedges on a platter. Spoon the laap on top and serve.

Friday, January 28, 2011

Keep It Simple


So here's a thought for the new year: Keep it simple. Since I've come back from vacation, which was filled with eating wonderful food in excess, and which followed the holidays and eating wonderful food in excess, I've been thinking I should eat less (though just as wonderful) food.

Even the most passionate foodie needs a break, especially when I'm putting on the pounds.

So this week I kept it simple. And simple doesn't have to mean cereal. I've never had cereal for dinner - not once! This week I had some salads and made a homemade Fontina mac and cheese. I sauteed baby spinach in olive oil and garlic - so easy and good with a little squeeze of lemon on top. And I made the simplest of Indian dishes, some tandoori style chicken legs made with a spice rub.

I used to be reluctant to use boxed spice rubs because I figured I had all the spices anyway, why not mix them myself? But then I saw my mom using them, and her chicken is amazing. It's tender and juicy and sprinkled with deliciousness. I've decided that deliciousness is actually a spice, or perhaps an undiscovered element.

Or it's this stuff, which can be found in any Indian store or ethnic market type of place. It's a very common brand.


The spice mix box has a recipe on it, but I wouldn't follow that. Here's what you should do. Use skinless drumsticks or thighs and rub salt all over them. Buy a ginger-garlic paste too, and rub that on the chicken. Or use fresh ginger and garlic. Then rub the spice mix all over the chicken. Use as much as you want, it can be spicy! Don't miss any spots though. Let that marinate for several hours or overnight. Even though you have to remember to marinate it, and you should be marinating all kinds of things on a regular basis, the spice rub and bottled ginger-garlic paste make for very fast prep. Bake in an oven heated to 375 degrees for 30 minutes, then brush with melted butter and move to the broiler. Broil on both sides until crispy and browned. In the summer, you can just throw the chicken on the grill...or into a tandoori if you have one! Squeeze some lemon on top when you serve it, this lovely dish of deliciousness.

Thursday, December 30, 2010

Top 10 Best Things I Made in 2010

Leaving a year behind can mean a whole new start, new resolutions, shaking off the old bad habits and acquiring new ones (bad and good!). Not so with food. When a good recipe enters my repertoire, it bears repeating and improving.

It wouldn't be New Year's Eve without a top ten list, and like other food bloggers I've assembled my Top 10 Best Things I Made in 2010. Some of these I made for the first time in 2010, some are old favorites that were presented to other people for the first time in 2010. Some I've written about here and some I just never got around to writing about or never had pictures for. In any case, they are memorable and sure to be repeated in 2011 and beyond.

10. Silken Comfort Tofu

I thought about writing about this tofu dish many times. It is warm, spicy, sweet and nutty. It is truly a representation of its name of silken comfort. It's not the tasteless tofu that many people fear. It is a treat, and since someone else wrote about it before me, I'll just refer you to that blog.

http://www.food52.com/blog/420_silken_comfort_tofu


9. Raspberry Ribbon Shortbread
A simple shortbread with raspberry jam baked onto it is the perfect Christmas cookie. (See recipe below)

8. Roasted Potatoes from Cook's Illustrated


The trick, my friend, is to parboil the potatoes first, then toss them with olive oil, salt, and pepper, before roasting them. This gives them a crisp exterior, creamy interior, and great flavor and color.

7. Haitian Chicken Puffs

These make a great appetizer. They are spicy and savory and anything with puff pastry is bound to be a success.

http://find.myrecipes.com/recipes/recipefinder.dyn?action=displayRecipe&recipe_id=10000001981753

6. Miso Butter

I just made this a few weeks ago and waxed effusively about it. I can't imagine making steak without miso butter now.

http://cook-it-yourself.blogspot.com/2010/12/warmth.html


5. Winter Cabbage Salad


I've got to throw a salad in here, and this is the best one of the year, edging out a nice Thanksgiving spinach and pear salad, a mushroom, fennel and parmigiano-reggiano layered salad, a frisee, ham and egg salad with dijon dressing, and any kind of salad with avocados.

http://cook-it-yourself.blogspot.com/2010/02/getting-bad-rap.html


4. New York Style Crumb Cake

You will look for excuses to make this crumb cake. Suddenly you'll be throwing tea parties and showers, even though you're a celebrated hermit. You'll volunteer to bring in the cake for the office potluck and the 4th of July picnic. You'll invite yourself to your neighbor's annual summer luau and claim the cake is a Hawaiian staple. It's that good.

http://www.epicurious.com/recipes/food/views/New-York-Style-Crumb-Cake-358217

3. Chicken and Dumplings

This is the real thing. Boiling a whole chicken to make your own stock, gravy, and topping it off with dumplings is comforting and makes your feel a little like Martha Stewart or a settler of the old west or something.

http://find.myrecipes.com/recipes/recipefinder.dyn?action=displayRecipe&recipe_id=10000001134065

2. Bacon Shrimp and Grits


I wrote about how decadent this recipe was, but it's also great because once you've made it you don't really need the recipe anymore. What could be easier than chopped onions and garlic, butter and olive oil, grits, bacon, and shrimp cooked in bacon fat?

http://cook-it-yourself.blogspot.com/2010/05/decadent.html

1. Double Chocolate Mocha Brownies


Dense and chocolaty, they are my favorite kind of brownie. There was a time when I never made brownies from scratch. They always came from a box and they were perfectly acceptable. But let me remind you that desserts are a lot of calories and perfectly acceptable is not good enough. They need to be AMAZING. And these are.

http://cook-it-yourself.blogspot.com/2010/02/kind-of-brownie-i-like.html

Here's wishing for a 2011 with as many great new finds and rediscovering old favorites, in food, friends, and life. Cheers!

Raspberry Ribbon Shortbread
Yield: 4 dozen bars

Dough:

½ cup (1 stick) butter, softened

½ cup vegetable shortening

½ cup powdered sugar

1 large egg yolk

1 tsp vanilla extract

2 ¼ cups all purpose flour

¼ tsp salt

½ cup seedless raspberry jam for filling (stir until smooth in a small bowl)

Beat butter, shortening, sugar, egg yolk and vanilla in mixer bowl at medium speed until light and fluffy. With mixer on low speed, add salt and flour. Beat just until blended. Divide dough into four equal parts and flatten each slightly into a disk. Wrap each in plastic and refrigerate for a least 2 hours until firm or overnight.

Preheat oven to 350 degrees. On a lightly floured surface, shape each disk of dough into a 12 inch long “rope” then flatten to 5/8 inch thick and about 2 inches wide. Place on an ungreased cookie sheet, 2 inches or so apart. Using the handle of a wooden spoon, press a ¼ inch deep groove along the center of each rope.

Bake 12 minutes. Remove from oven and gently press grooves down again using spoon handle. Fill each groove carefully with jam. Return to oven and bake 8-10 minutes more until firm and light golden brown at edges. Remove pan from oven.

Let cool 10 minutes on pan, then gently cut into ¾ - 1 inch wide slices. Transfer to wire racks and cool completely.

Tuesday, December 28, 2010

Homey

I'm spending this last week of the year being homey. Which is not to be confused with being homely.
Homey: comfortably informal and inviting; cozy; homelike
Homely:
lacking in physical attractiveness; not beautiful; unattractive; not having elegance, refinement or cultivation.

What I mean to say is, I'm spending some time at home at this week, making my place warm and cozy, comfortable and inviting, and part of doing that is cooking up some yummy food. Yummy is kind of a homey word itself. When you read a restaurant review, you see words like "delicious" and "tantalizing" and "excellent". But rarely do you see "yummy". And yet, as a home chef, I cannot think of a better word to describe the taste of cookies, cupcakes, stews, soups, bread puddings, and roasts that come from my homey kitchen.

Homey is like homely in that it is not aspiring to be elegant, refined, or cultivated. It is only aspiring to be yummy. It makes you feel good, and that is often just enough.

Happy New Year and enjoy this homey recipe for Pork and Wild Rice Soup. I ended up overcooking it a bit, and it turned into less of a soup and more of a pork and wild rice dish but the flavors are solid, and extremely yummy.


Pork and Wild Rice Soup (Cooking Light)

Ingredients

  • 1 tablespoon extra-virgin olive oil, divided
  • 1 pound pork tenderloin, trimmed and cut into 1/2-inch pieces
  • 1/3 cup brown and wild rice blend
  • 1/4 cup finely chopped onion
  • 3 garlic cloves, minced
  • 2 serrano chiles, seeded and minced
  • 1 cup water
  • 1 teaspoon chopped fresh oregano
  • 1 (32-ounce) carton fat-free, lower-sodium chicken broth
  • 1 (15-ounce) can black beans, rinsed and drained
  • 1/4 cup chopped fresh cilantro
  • 2 1/2 tablespoons fresh lime juice
  • 1/4 teaspoon kosher salt
  • 1/4 teaspoon freshly ground black pepper
  • 3 tablespoons crumbled queso fresco
  • 1 sliced peeled avocado
  • 24 baked tortilla chips
Heat 1 1/2 teaspoons oil in a Dutch oven over medium-high heat. Brown pork on all sides. Remove from pan. Heat remaining 1 1/2 teaspoons oil in pan, scraping pan to loosen browned bits. Add rice, onion, garlic, and chiles; sauté 3 minutes or until onion is tender. Add pork, 1 cup water, oregano, broth, and beans; bring to a boil. Cover, reduce heat, and simmer 15 minutes or until rice is tender. Stir in cilantro, juice, salt, and pepper; simmer 2 minutes. Top each serving with cheese, avocado, and chips.

Sunday, December 12, 2010

Warmth

December snuck up on me. I feel like I'm not quite over summer. Summer was good to me this year. It seduced me with warm winds and sunshine. It heated me from within. I think I walked around with a little summer glow for weeks after the last 80 degree day, pretending it was just gone for a day or two instead of months.

But there's no denying when December rolls around, the halls are decked and the first snowstorm descends, that summer is really gone. So I've been looking for a recipe that can heat me from within. There are soups and curries and braised meats that do the job nicely of course. But it's not just the heat of a spicy curry that I want. That hits your tongue and burns and titillates but doesn't last. It's a flirtation. I'm looking for a deeper warmth. Like being wrapped in a fleecy robe, the flavor permeates every pore.

What I found last week was unusual and amazing and completely unexpected. It was a steak topped with miso butter, and while you might think that sounds weird or interesting but not particularly warm, let me emphasize the butter part of miso butter. Because butter is warming. Maybe because it adds layers of fat to your body - I won't deny that possibility! But melt some butter over a good steak and it adds such a depth of flavor, especially when mixed with some salty miso, soy sauce, rice vinegar and ginger, that you are warmed from your tongue to your toes.

This recipe from Bon Appetit is for a Coriander Crusted Steak with Miso Butter, but I say you make that miso butter and put it on anything in the vicinity. A nice lean steak is best, otherwise it's too fatty to take the additional fatty topping. A note on buying miso paste - I had to buy a huge bag once as that was the only size I could find but it seems to last forever in the fridge. I've used it for salad dressings quite a bit, and now I'll be using it for miso butter as much as possible.


Miso Butter (Bon Appetit)
Yield: 2 servings

Ingredients:
2 tablespoons chopped fresh cilantro
2 1/2 tablespoons unsalted butter, melted
2 tablespoons chopped green onions
2 tablespoons unseasoned rice vinegar
1 tablespoon red miso paste
1 tabespoon minced peeled fresh ginger
1 teaspoon soy sauce
2 tablespoons sake

Mix all ingredients through soy sauce. Cook the steak in a skillet and reserve your skillet. Add miso butter and sake, and boil until slightly thickened and reduced to 1 /4 cup, whisking often, about 1 minute. Spoon over steak.

Friday, November 26, 2010

Not Your Traditional Thanksgiving

When I was a little girl, my desire was for my family to celebrate, as all American families did, the traditional holiday of Thanksgiving. I didn't know my family wasn't American, not really. We didn't have loads of relatives to celebrate with, we ate with our hands and by the way, we didn't eat meat on Thursdays.

Last night my dad told me how I really wanted a turkey for Thanksgiving when I was old enough to know what you were supposed to eat. And yet there were only three of us to feed on this holiday, when we didn't have other families to join us and even if we did, they were other Indian families with no interest in turkey or mashed potatoes that weren't burnt yellow with turmeric. So he brought home a chicken. Was I fooled, I asked. Of course I was! My little unsophisticated palate didn't know any better.

Over the years, our Thanksgiving celebrations evolved. Some years we did actually have turkey (I checked the label), one year there was ham. Eventually we switched to celebrating on Friday at a friend's place so we could have the meatiest of meals, and Thanksgiving Thursday became either a non-event or a time for me to join other friends for a meal.

The last three or four years Thanksgiving has evolved again into a vegetarian feast. Last night, for example, we had butternut squash soup with chopped apples, fettucine alfredo, spinach and pear salad, sweet potato biscuits with honey butter, brussel sprouts, fruit and ice cream. I hardly missed the turkey.

Thanksgiving is actually a holiday made for immigrants, and I love the idea of making it fit my family's immigrant needs. And I'm all for two delicious meals instead of one!

Here's the sweet potato biscuits I made yesterday, which could go with any traditional or untraditional meal. Appropriately, they are from an "American" cookbook, but then what is American other than a blend of a myriad of cultures?


Sweet Potato Biscuits (from Bobby Flay Cooks American)
Makes 12

Ingredients:
2 cups all purpose flour
1 tablespoon plus 1/4 teaspoon baking powder
1/2 teaspoon baking soda
1/2 teaspoon salt
5 tablespoons cold unsalted butter cut into pieces
7/8 cup buttermilk
1/2 cup mashed cooked sweet potato (about 1)
1 tablespoon honey

Preheat oven to 375 degrees and line a large baking sheet with parchment paper or use a nonstick baking mat. Sift the dry ingredients together into a large bowl. Cut in the butter until the mixture resembles rolled oats.

Make a well in the center of the mixture and add the buttermilk, sweet potatoes and honey. Stir vigorously until the dough forms a ball. Knead lightly for about 30 seconds, until the dough just begins to look smooth.

On a floured surface, pat the dough out 3/4-inch thick into a 7 by 8 inch rectangle. Either cut into 2 inch rounds with a biscuit cutter or slice into 12 squares (which eliminates the need to reroll all scraps into another biscuit). Transfer to the prepared pan and bake for 10-12 minutes until lightly browned.

Serve with honey butter: Mix four tablespoons of softened butter with two tablespoons of honey, or more to taste.

Sunday, November 14, 2010

Potstuck

About ten years ago, my roommates and I were involved in a cooking extravaganza. Every dinner we made, every party we threw, was an elaborate array of dishes, around which we arranged to invite and impress our nine friends. Let's be honest, the parties were for us, not for them.

At random moments, I'll remember something ridiculous we cooked. Ridiculous because it was incredibly complex for a party full of 22 year olds who would be happy with a keg and a bag of Ruffles. Deep fried ravioli, grilled pineapple soaked in rum, a fruit salad in a watermelon half, marbled cheesecake squares (yes that does mean making two types of cheesecake batter), and who could forget our "authentic" Chinese New Year meal?

Using a fabulous cookbook called the China Moon Cookbook which taught us how to make our own hot chili oil, we slaved over egg rolls and hot and sour soup. But the best thing about learning to make Chinese food was finding out how easy it was to make our own potstickers.


Potstickers or dumplings or gyoza - whatever you want to call them - are the most pleasing little packaged food. With a lovely, chewy wontonny wrapper and a gingery garlic filling, a potsticker is hardly any more trouble than mixing up a batch of meatballs. Pork is a popular filling, but I'm a fan of ground chicken too. The best part of potstickers is how easy it is to cook them, but you have to do it the right way or they will be potstuck.

Lemongrass Chicken Potstickers (Food and Wine)

Ingredients
1 lb ground chicken
1 cup finely shredded napa cabbage
1/4 chopped cilantro
2 tablespoons finely grated lemongrass
2 tablespoons snipped chives
1 tablespoon minced fresh ginger
1 minced garlic clove
1 beaten egg
1 teaspoon kosher salt
wonton wrappers
peanut oil

Mix all ingredients, kneading into the ground chicken. Fill a small bowl with water. Wet your finger and rub it around the edges of the wonton wrapper. Place a tablespoon of filling in the center of the wrapper. Lift the sides and press together. I keep it simple by making triangles but you can also crimp the edges or something fancier. It can take some time to fill all the wontons, but just plop yourself in front of the tv while you do it.

When your potstickers are ready, heat two tablespoons of peanut oil in a frying pan on medium-high heat. Fill the pan with potstickers with their pleated edges up and cook until the bottoms are lightly browned, about 2 minutes. Add 1/4 cup of water and cover, reducing heat to medium. Finish the potstickers by steaming them in the pan for five minutes until filling is cooked through and water has evaporated. Uncover and brown the bottoms another 1 minute. Transfer to plate and repeat with any remaining potstickers.

You can also freeze extra potstickers. Placed them on a sheet of parchment on a baking sheet that fits in the freezer. Freeze separately, then put in a zip lock bag and store in the freezer for up to 1 month. Cook the same way from frozen.

Saturday, November 6, 2010

Meeting a New Friend

Every day I have the choice to try a new recipe or make something I know is going to be good, that I've perfected, and that leaves me satiated. This is a surprisingly difficult choice for me. I like everything I eat to be a good, valuable consumption of calories. Otherwise I'm just crabby.

But I have a definite preference towards variety. I get three cooking magazines, have around twenty cookbooks, and search the internet constantly for recipes. But it's only worth it if I occasionally find a recipe that is worth making over and over again.

Kind of a conundrum isn't it?

Because there are recipes full of high hopes and disappointments. There are recipes that are so much work that I'll never bother with them again. There are recipes that are good but forgettable. And there are recipes that are one ingredient away from being something I already have a great recipe for. After all, how could those cooking magazines really print so many brand new recipes every month?

When I do find something new that is good, it's like meeting a new friend. You thought you had all the friends you needed in your life, and then you meet someone else who makes you laugh really hard and just gets you. One of my best friends I've known all my life, another I met barely three years ago. It's like that with best recipes too.

So here's my latest find. I just made it last night, and it has two components that taste pretty good by themselves but together they are outstanding. They are a pop of flavor in your mouth, a wake up call that reminds how many good things and people there are in life that are yet to be discovered.

Wild Mushroom Cakes with Avocado Pesto (modified from Bon Appetit)
4 servings

These cakes make a nice light appetizer, though I ate six little ones as my entire meal.

Mushroom Cakes
2 tablespoons butter
2 tablespoons olive oil
2 8-ounce packages sliced button mushrooms
2 large portabello mushrooms, gills scraped out and sliced
8 ounces fresh shiitake mushrooms, stemmed, sliced
2 garlic cloves, minced
2 large eggs, beaten to blend
2 tablespoons finely grated Parmesan cheese
2 tablespoons chopped fresh basil
2 tablespoons chopped fresh Italian parsley
1 teaspoon salt
1/2 teaspoon freshly ground black pepper
1/2 cup panko breadcrumbs

Avocado Pesto
2 large avocados coarsely mashed
1/4 cup finely grated Parmesan cheese
2 tablespoons chopped fresh cilantro
2 teaspoons fresh lime juice
1/4 cup plus 2 tablespoons olive oil

Make pesto: Add avocado, Parmesan, cilantro, and lime juice to a food processor. Process to blend. With machine running, gradually add 1/4 cup oil through feed tube. Transfer to bowl and season to taste with salt and pepper.


Melt butter with oil in heavy large skillet over medium-high heat. Add all mushrooms and saute until browned and edges begin to crisp, stirring often, about 14 minutes. Add garlic and stir 1 minute. Transfer mixture to processor and allow to cool five minutes. Add eggs, Parmesan, herbs, salt, and pepper to processor. Using on/off turns, process until mushrooms are coarsely chopped. Transfer to large bowl. Mix in 1/2 cup panko.


Divide mushroom mixture into 8 equal portions. Form each into a 3/4 inch thick cake. Spread additional panko out on plate. Coat cakes with panko. Melt butter with 2 tablespoons oil in large skillet over medium heat. Working in 2 batches, add mushroom cakes. Cook until browned and cooked through, about 5 minutes per side.

Serve mushroom cakes with avocado pesto.

Sunday, October 17, 2010

Something to Do With Nutella

It does not seem right to eat cookies for breakfast. Even if they are salted Nutella peanut butter cookies. Even if they are thin, chewy, sweet with a hint of salt, perfect with a cup of tea or coffee on a brisk fall morning.

But then again, it's Nutella. And if you don't know what Nutella is by now, get yourself to a supermarket, charge down the peanut butter aisle and scoop up several of those little European pots of chocolate hazelnut spread. You have some studying to do.

I've been looking for something to do with Nutella other than eat it out of the jar with a large spoon. Typically I will make some crepes, spread them with Nutella and roll them up for dessert. A chopped banana is good in there too, but don't try to pretend it's healthy at all. The crepe just becomes a sort of edible vessel to transfer Nutella to your mouth.

But I'm not always in the mood for making crepes, primarily because I eat them far faster than I can make them. So recently after I spotted a recipe for Nutella cupcakes, I started searching for other Nutella desserts. That's when I came across this super easy cookie recipe. Very few ingredients, nicely balanced in texture and flavor. So don't tell me it's wrong to eat cookies for breakfast. What's wrong is not making Nutella a regular part of your breakfast, in some form or another.


Salted Nutella Peanut Butter Cookies
Yield: 2 dozen

Ingredients:
  • ¾ cups Nutella
  • ¼ cups smooth peanut butter
  • ¾ cups granulated sugar
  • 1 teaspoon baking soda
  • 1 egg, lightly beaten
  • ¼ teaspoons kosher salt plus extra for sprinkling
  • 1 tablespoon cocoa powder
  • 1/4 cup flour

  • Preheat the oven to 350 degrees.
  • Mix all the ingredients together until just combined.
  • Roll the dough into ½ inch thick balls (you can vary the size). Place balls one inch apart on a cookie sheet lined with parchment paper. Flatten slightly, then sprinkle each cookie with kosher salt.
  • Bake 8 minutes. Let cool on the parchment for one minute and then transfer to a wire rack.


  • Sunday, October 3, 2010

    Pumpkin Bread

    I was frantic. I couldn't find my favorite pumpkin bread recipe and I had promised my knitting group I would be making seasonal treats. It's finally October, which is the season of trench coats, knee high boots, and pumpkin recipes.

    About ten years ago, I procured a pumpkin bread recipe from a co-worker. It was made with brown sugar, cinnamon, and chocolate chips. It was almost cake like in consistency. It was a favorite recipe that I turned to every fall. It made two loaves so I doled out pumpkin bread to all my friends and co-workers. I didn't think anyone could beat that pumpkin bread.

    Then about three years ago, when I worked at a different job in a different city and state, I ran across another pumpkin bread recipe at work. It only took moments with this new bread for me to abandon my old recipe and commit myself to the new one. Unlike its rival, this pumpkin bread was made with white sugar, four different spices, and not an ounce of chocolate. But it was delicious.

    So the following year, I held a bake off. A pumpkin bread head-to-head. I insisted that my co-workers try both breads and vote. And despite the lure of chocolate in the first bread, only one person voted for it. Everyone else preferred the second, spiced up version.

    The recipe is on a folded piece of paper. It is a photocopy of a photocopy from some unknown cookbook. It is oddly named "Lydia's Pumpkin Bread" and has another woman's name (not Lydia) at the bottom. The instructions are vague and brief, and I always leave out the raisins and nuts. It turns out wonderful every time.


    So that's why last night and again this morning I frantically searched through my recipe clippings until I finally found it. There was no alternative and no electronic version. And that's why I had to record it here, so I never have to frantically search for it again.


    Lydia's Pumpkin Bread
    Yield: 1 loaf

    Ingredients:
    1 1/2 cups sugar
    1/2 vegetable oil
    2 eggs
    1 cup pumpkin (about 1/2 can)
    1 3/4 cups flour
    1/4 tsp baking powder
    1 tsp baking soda
    1 tsp salt
    1/2 tsp cinnamon
    1/2 tsp cloves
    1/2 tsp nutmeg
    1/2 tsp allspice
    1/3 cup water
    raisin or nuts (optional)

    Preheat oven to 350 degrees. Mix the first four ingredients in order in a large bowl. Sift remaining dry ingredients (flour through spices) in a separate bowl. Add flour mixture slowly to wet ingredients, alternating with water, and mixing after each addition. Spray a loaf pan with cooking spray. Pour batter into loaf pan. Bake at 350 degrees for 1 hour. Test with knife in center of loaf. If knife comes out dry, bread is done.

    Monday, September 6, 2010

    Grill Master


    This here is my little grill. I've had it for over ten years and it's beginning to show its age. For one thing, it's become bowlegged. But I'm fond of it anyway, and I've been grilling up a storm this summer. I'm something of a grill master.

    I don't know why people assume that grilling is for men. I love grilling. I've always grilled with charcoal, and I love lighting up a match and watching the lighter fluid flame up. Then I'll watch the flames dance in the bowl of the grill, until they slowly die down into a white ashy coating on the charcoal. I love that smell, the anticipation of a good, hot grill.


    You can't be a grill master until you've made ribs. They are succulent, salty and sweet all at once. They are sticky and saucy and spicy. They are that naughty best friend you had growing up, the one who was trouble, but too much fun to stay away from.

    Ribs were made to be grilled, so all that fat crisps up and they take on the smokiness of the charcoal. Most recipes call for the ribs to be boiled first, but here I've adapted an oven baked recipe to be finished on the grill. Start off by rubbing the ribs with a fragrant spice rub. Pop them in the oven for 75 minutes while you make the sauce and get the grill ready. Spread the hot coals in a single layer so you can cook all the ribs evenly. Then baste the ribs with the sauce and throw them on the grill. Five minutes per side should do it. Look at that, you're a grill master!


    Spicy Chipotle Ribs (Gourmet)

    Spice rub ingredients:
    • 2 tablespoons packed dark brown sugar
    • 1 1/2 teaspoons salt
    • 2 tablespoons paprika
    • 1 1/2 teaspoons chile powder
    • 1 1/2 teaspoons ground cumin
    • 1 teaspoon ground allspice
    • 1/2 teaspoon black pepper
    • 2 (2-lb) racks baby back ribs
    Sauce ingredients:
    • 1 1/2 cups chopped onion (from 1 large)
    • 6 garlic cloves, finely chopped
    • 1 1/2 tablespoons finely chopped peeled fresh ginger
    • 2 tablespoons vegetable oil
    • 1 1/2 cups ketchup
    • 1/2 cup cider vinegar
    • 6 tablespoons soy sauce
    • 1/2 cup water
    • 1/4 cup packed dark brown sugar
    • 1 chipotle pepper and 1 tablespoon adobo sauce
    • 1 1/2 teaspoons salt
    • 3/4 teaspoon black pepper

    Preheat oven to to 350°F. Whisk together brown sugar, salt, and spices in a small bowl. Line a 17- by 12- by 1-inch heavy-duty baking pan with a double layer of foil, then oil foil. Pat ribs dry and arrange in baking pan. Rub ribs all over with spice mixture. Cover pan tightly with foil; bake 1 1/4 hours. Remove foil.

    Make sauce while ribs bake:

    Cook onion, garlic, and ginger in oil in a 2-quart heavy saucepan over moderate heat, stirring occasionally, until softened, about 6 minutes. Add remaining ingredients and simmer, uncovered, stirring occasionally, 15 minutes.

    Purée sauce in 2 or 3 batches in a blender until smooth, or with a hand immersion blender (use caution when blending hot liquids).

    Prepare grill. Remove ribs from oven and baste with sauce. Transfer to grill and grill for 5 - 6 minutes. Turn and baste again, grilling for another 5 - 6 minutes.

    Monday, August 23, 2010

    A Summer for Eating Outside

    Every once in a while, just to make sure it's really summer, I eat a meal outside. When the air feels warm and non-air conditioned, and a breeze carries the scent of grilled meat, and I can sit on my balcony and stare down at the neighbors who camp on their porch all weekend as though we lived in the deep south - then I know it's summer.

    This summer I've eaten lunch on my balcony every weekend. I've eaten rapidly melting mint chocolate chip ice cream while walking down the street, or frozen custard while sitting outside the frozen custard shop watching people at the walk up window with their dogs in tow. I've eaten outside but inside my parents' enclosed patio with the wind blowing through the screen but the bugs staying thankfully in the yard. I sat on a deck drinking beer and grilling hamburgers in Virginia on July 4th, and the next day I squatted on a blanket eating chicken salad and veggies and dip while listening to the North Shore concert band in Illinois.

    It's been a summer for eating outside, where the food tastes so fresh, it's like it grew out of the ground just a few feet from where I sit.

    Last night I sat outside again, at a picnic table eating fresh tomatoes. If you're going to eat anything outside, it should be a ripe, summery tomato. It should be bloody red, juicy, topping sandwiches or layered with fresh mozzarella or eaten like an apple, out of hand. Or best of all, toss it with some toasted Italian bread cubes, basil, olive oil, salt, and pepper for a tomato-bread salad. And eat it fast, before the bugs or the end of summer get you.


    Panzanella (Italian Bread Salad) by Emeril

    Ingredients

    • 1/2 French bread loaf cut into 1" cubes
    • Olive oil for frying
    • Salt and pepper
    • 3 tablespoons chiffonade of basil
    • 3 tablespoons extra virgin olive oil
    • 1 tablespoon balsamic vinegar
    • 1 teaspoon minced garlic
    • 4 Italian Roma tomatoes, cut into 1/2 " slices

    Directions

    For croutons: In a large saute pan, heat the olive oil. When smoking hot, add the bread cubes and fry until golden, about 3-4 minutes. Stir often to prevent from sticking. Remove from pan and drain on a paper-lined plate. Season with salt and pepper. Toss the remain ingredients together in a mixing bowl. Season with salt and pepper.

    To assemble, toss the fried bread with the other ingredients and place on a platter. Can be made ahead of time, by keeping the bread separate until serving.

    Monday, August 9, 2010

    Time for Corn

    I started eating this season's corn in June and by July I was corned out. Now it's August, and everywhere I look, I see corn recipes. Every cooking magazine is filled to the brim with variations on roasted corn and corn chowder and skillet fried corn and caramel corn. I've been completely disinterested.

    Instead, I've focused on ice cream festivals and savory bread pudding and pizza with mozarella cream sauce and Italian sausage. I've focused on the green peppers and basil and oregano that overflowed a co-worker's garden and arrived clean and bright in my cube. I focused on firing up my lopsided little grill on my balcony and grilling chicken drumsticks and mushrooms and trout with lemon slices.

    There hasn't been time for corn in this busy cooking life of mine.

    But finally one of those devilish corn recipes caught my eye because it was disguised as something I love: pesto. And it had bacon in it.

    Corn pesto is similar to basil pesto - it's blended with garlic, salt, pine nuts and Parmesan. A good glug of oil is added, and it's tossed with pasta. But the corn is cooked in bacon fat, and when blended it turns creamy like a carbonara. Add a little pasta cooking water and season with more salt, and you'll find it more satisfying than a cream sauce. People are always looking to eat light things in the summer but I'm not. Bring on the heavy, hearty food all year round!


    Tagliatelle with Fresh Corn Pesto (from Bon Appetit)
    • 4 bacon slices, cut lengthwise in half, then crosswise into 1/2-inch pieces
    • 4 cups fresh corn kernels (cut from about 6 large ears)
    • 1 large garlic clove, minced
    • 1 1/4 teaspoons coarse kosher salt
    • 3/4 teaspoon freshly ground black pepper
    • 1/2 cup freshly grated Parmesan cheese plus additional for serving
    • 1/3 cup pine nuts, toasted
    • 1/3 cup extra-virgin olive oil
    • 8 ounces tagliatelle or fettuccine
    • 3/4 cup coarsely torn fresh basil leaves, divided

    Cook bacon in large nonstick skillet over medium heat until crisp and brown, stirring often. Using slotted spoon, transfer to paper towels to drain. Pour off all but 1 tablespoon drippings from skillet. Add corn, garlic, 1 1/4 teaspoons coarse salt, and 3/4 teaspoon pepper to drippings in skillet. Sauté over medium-high heat until corn is just tender but not brown, about 4 minutes. Transfer 1 1/2 cups corn kernels to small bowl and reserve. Scrape remaining corn mixture into processor. Add 1/2 cup Parmesan and pine nuts. With machine running, add olive oil through feed tube and blend until pesto is almost smooth. Set pesto aside.

    Cook pasta in large pot of boiling salted water until just tender but still firm to bite, stirring occasionally. Drain, reserving 1 1/2 cups pasta cooking liquid. Return pasta to pot. Add corn pesto, reserved corn kernels, and 1/2 cup basil leaves. Toss pasta mixture over medium heat until warmed through, adding reserved pasta cooking liquid by 1/4 cupfuls to thin to desired consistency, 2 to 3 minutes. Season pasta to taste with salt and pepper.

    Transfer pasta to large shallow bowl. Sprinkle with remaining 1/4 cup basil leaves and reserved bacon. Serve pasta, passing additional grated Parmesan alongside.

    Monday, July 19, 2010

    Let's Be Realistic

    Let's be realistic. If a recipe calls for Mexican oregano and I've got a bag of plain old oregano bought in bulk, am I going to run out to the store? If a recipe calls for sweet Hungarian paprika and my bottle has no affiliation with an eastern European country, am I going to abandon ship? And are panko breadcrumbs really far superior to other breadcrumbs?

    All this time I've been preaching about cooking things yourself. But cooking it yourself is not about cooking it Top Chef style with a million ingredients, most of which are packaged in large quantities but only required in 1/4 teaspoons. It's about being realistic about what you need and what you don't need, and knowing what tastes good enough to eat at home because this isn't a restaurant and you don't need to put parsley on the plate so why buy a bunch for a recipe that requires five leaves?

    But enough of that tirade. Let's just take a Top Chef recipe and see what we can make of it. A couple weeks ago, the recipe for Sesame Lamb Meatballs won the elimination challenge on Top Chef and I was all about making it at home. I figured it had some lamb, some sesame paste, salt, pepper, olive oil. You know, the basics. Then I looked at the recipe and counted 17 ingredients, or 18 if you want to count the lemongrass skewers the meatballs are threaded on. There were two kinds of meat! There were two kinds of sesame seeds!

    I nixed the ground beef right away. These were lamb meatballs, I was sold on lamb meatballs, and I wasn't going to buy ground beef just to use 4 ounces of it. Next I nixed the parsley because, as mentioned above, I have no use for leftover parsley and my fridge is getting tired of the mess it leaves. Next I addressed the roasted garlic oil. I'm not sure if one can buy roasted garlic oil. I'm certain that I could make roasted garlic oil, but did I really want to make it? So I resigned myself to just adding roasted garlic, and then at the last minute just added chopped garlic and nixed the roasting altogether.

    Next on the list was sherry vinegar, which I never have around but see in recipes all the time. I decided I would buy sherry vinegar, but then I didn't see any at the grocery store and so I used my standby substitute, cider vinegar. It works just fine. Mexican oregano = oregano. Smoked paprika = paprika. And black and white sesame seeds would have to be just one or the other, whatever color I spotted at the supermarket first. But here's a hint - don't skip the tahini or the chile paste. Because these meatballs taste like sesame and chile, and everything else just adds deliciousness. Maybe I'm sacrificing a little bit of deliciousness, but I'm getting a lot of darn good meatballs either way.

    The moral of the story is, make decisions about what's realistic and make the recipe work for you. You're eating it - not some judge. And it's okay if the meatballs end up being flat instead of round (ahem).


    Top Chef Sesame Lamb Meatballs (from Bravotv.com - but edited)

    Ingredients:
    • 16 oz ground lamb
    • 1/8 cup chopped fresh cilantro stems
    • 1 Tbl chopped garlic
    • 2 Tbl cider vinegar
    • 1 Tbl sambal (chile paste)
    • 2 Tbl Tahini paste
    • 1/8 cup chopped shallots
    • 3 Tbl bread crumbs
    • ½ tsp oregano
    • ½ tsp paprika
    • ½ tsp ground cumin
    • 1 whole egg
    • 4 Tbl sesame seeds
    • Salt & Sugar, to taste

    1. Distribute all ingredients evenly.

    2. Form patties and wrap around skewers.

    3. Grill to desired doneness.